Quinoa Pizza Bites

Image

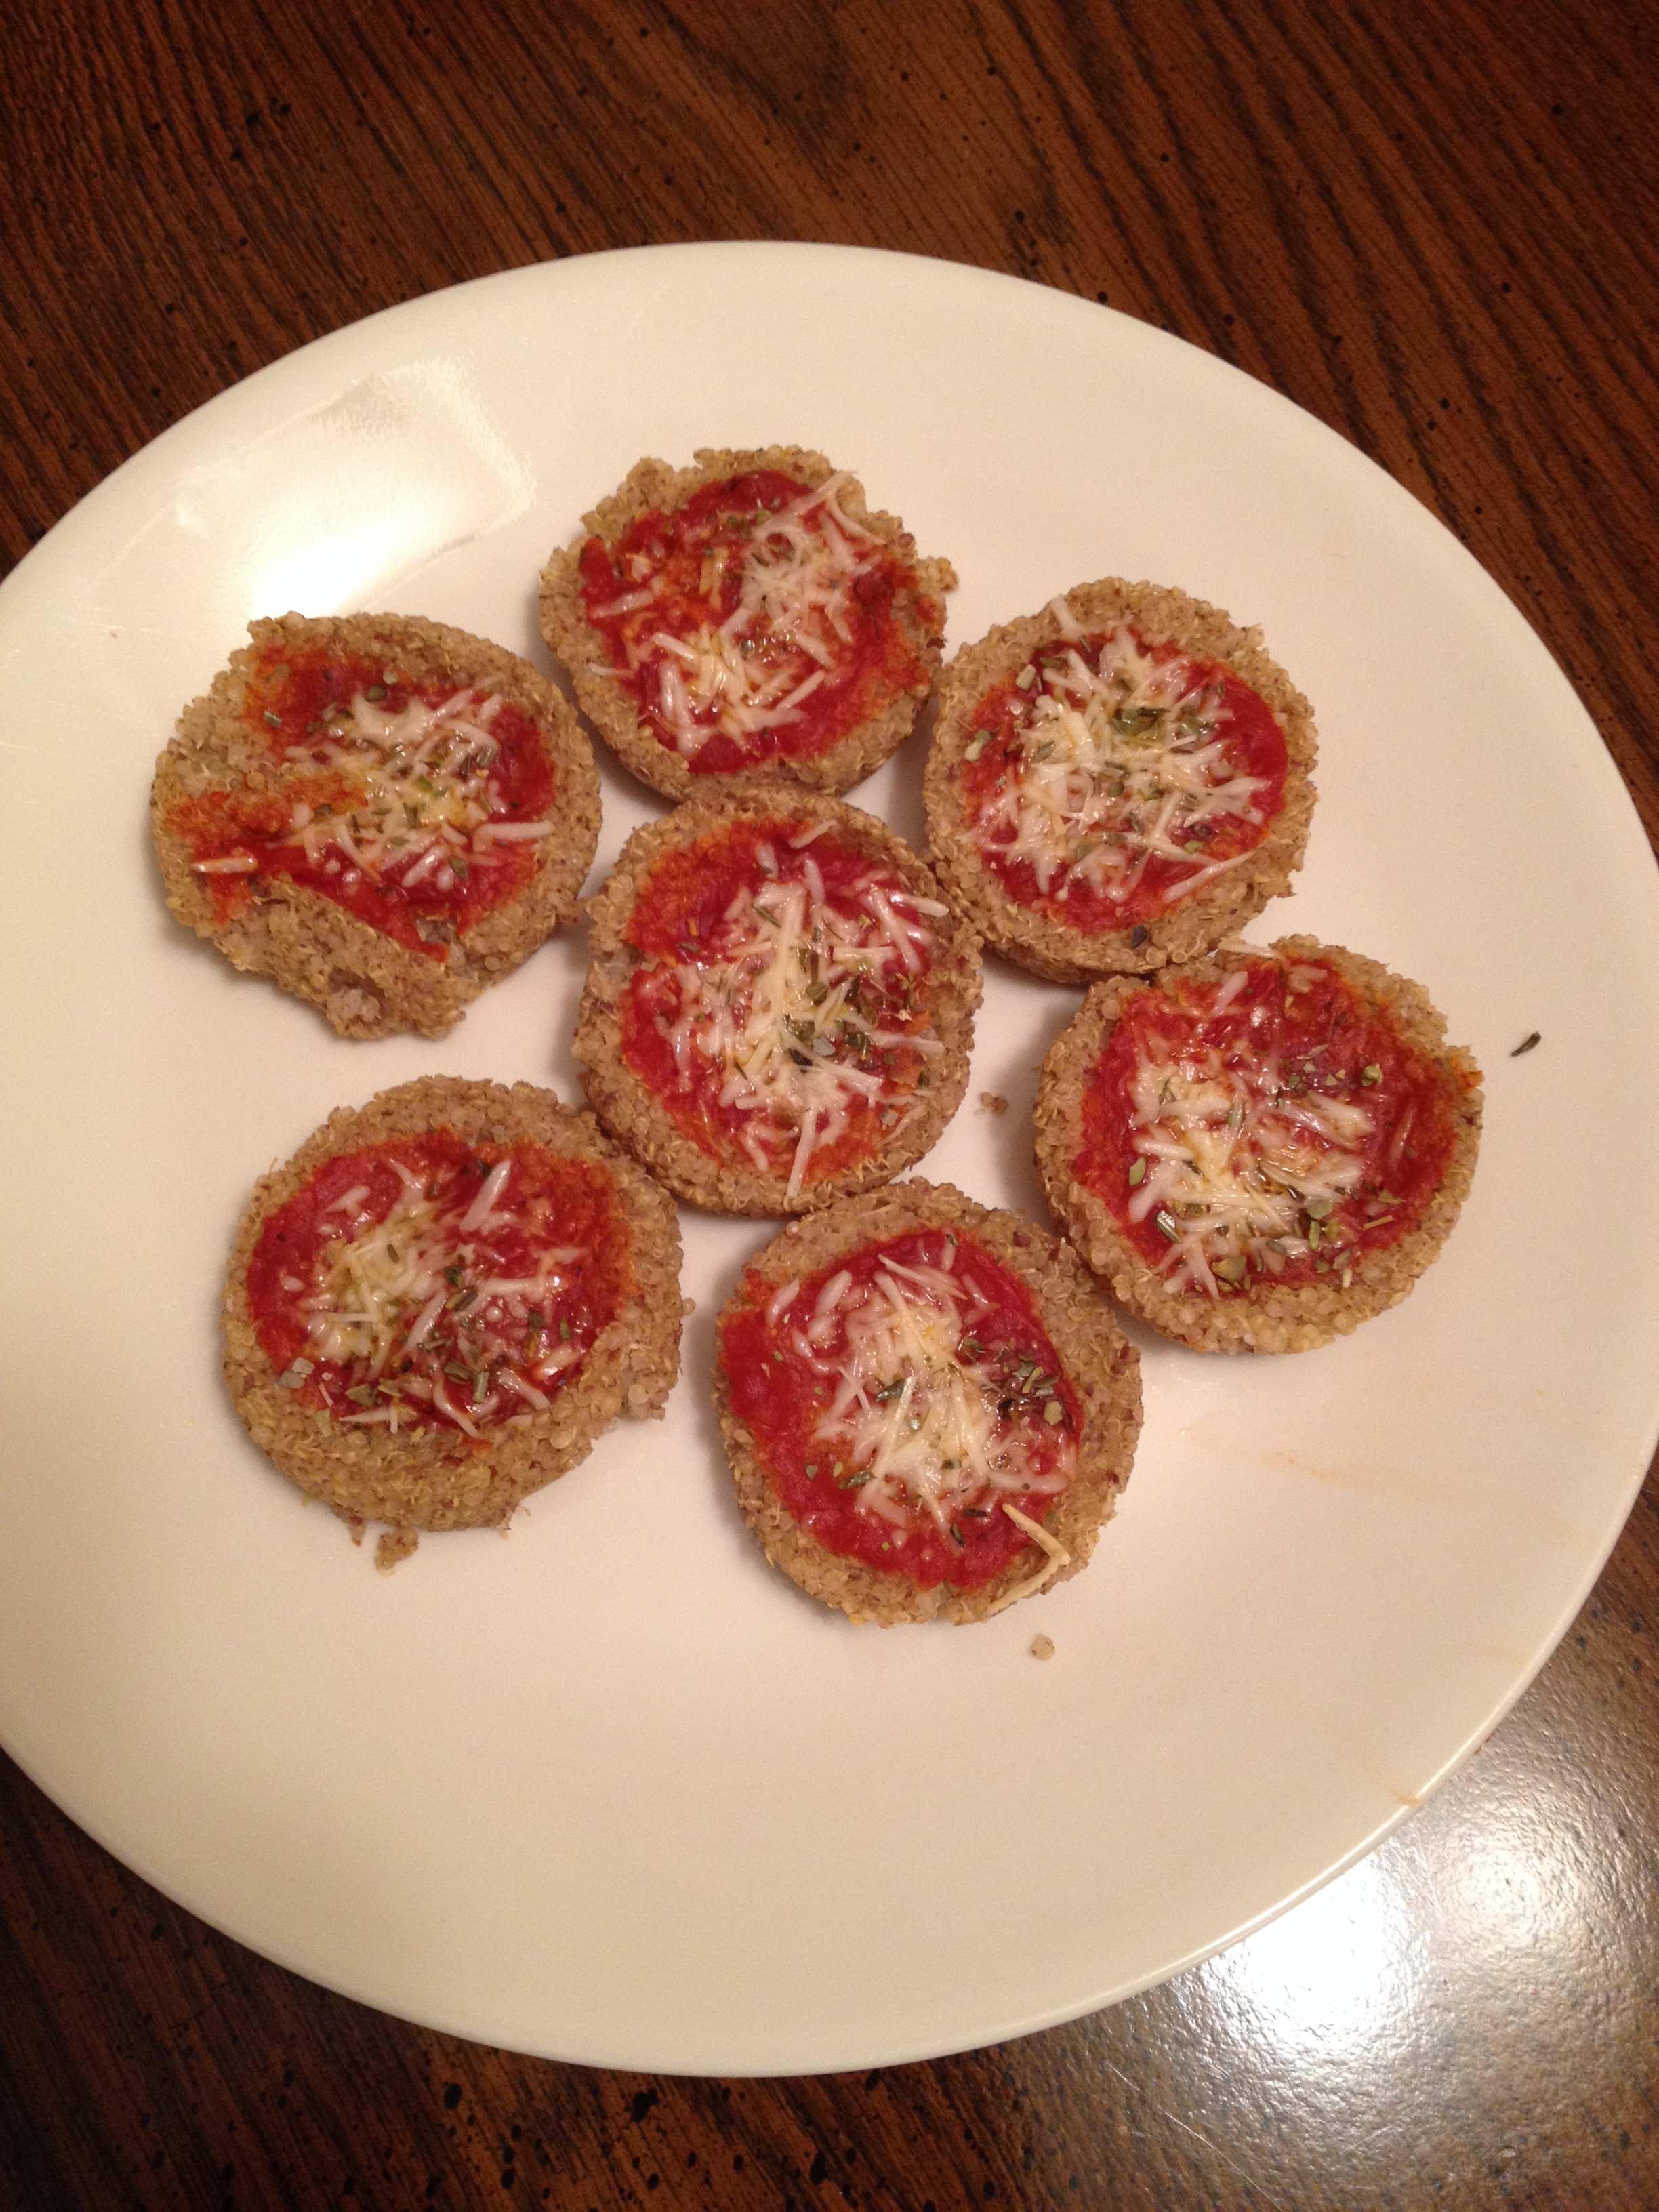
Right on b’ys!!  I did it!  I went and tried something new.  I did some research on healthy, but fun, recipes and found quinoa pizza bites.  I’ve always wanted an excuse to buy quinoa, and today I finally did!

This recipe is very, very basic and while it was good…I do plan on making some changes in the future.  I’ll explain more after I post the recipe.  Quick note, in case you’re wondering, Quinoa is pronounced KEEN-wah.

RECIPE FOR QUINOA PIZZA BITES

  • 1/2 cup Quinoa
  • 1 cup Water
  • 1 egg (For a substitute, use 1 1/2 tbsp. of milled flax seed combined with 4 tbsp. of warm water)
  • Pizza Sauce
  • Cheese
  • Pizza Toppings (if desired)

1)  Preheat oven to 350º.

2)  Boil water and add Quinoa.  After boiling for a couple of minutes, remove from heat, stir occasionally and allow quinoa to absorb the water.  This takes approximately 10-12 minutes.

3)  Once quinoa is ready and cooled slightly, add egg (or flax seed mixture) and mix with hands until quinoa is able to be formed into the pizza bites.

4)  In a greased muffin pan, fill each section 1/3 full with quinoa mixture.  Be careful not to overfill the sections as the bites will tend to taste bland.  Using a spoon, pack the mixture down gently and create a small dip in the middle of each bite.

5)  Bake the bites for 10 minutes.

6)  Remove the bites from the oven and add pizza sauce, toppings and cheese as desired.

7)  Bake again for 10-15 minutes.

8)  Remove from oven, cool and enjoy!

There you have it.  For my attempt, I used the flax seed mixture since (1) I didn’t have any eggs handy and (2) eggs used as a binding agent doesn’t really go over well with my family as most of us don’t like the taste of eggs.  In the original recipe, it simply said “bake for 20 minutes”, however I found it left the bites really crumbly and hard to manage.  Afterwards, I noticed that another recipe said to bake the bites before adding the toppings so that they end up more firm.

The next time I try this recipe, I plan on adding some flavor to the quinoa such as garlic, chili powder or oregano.  Quinoa is much like rice in that it takes on the flavors you add.  Quinoa itself is rather bland, that’s why I think adding some flavor will really make the bites tasty.

I hope you enjoy these!

Advertisement

Chocolate Peanut Butter Marshmallow Squares

Image

I’m a lover of peanut butter, but only when it’s coupled with something else such as peanut butter and jam.  My favorite combination is the following recipe I’m about to share with you – chocolate peanut butter marshmallow squares.  These are SO yummy!  I promise you that you’ll be battling your kids for the last one.

There are many variations of this recipe out there and they all have different tastes and textures.  My recipe yields a rich peanut butter flavor with a hint of chocolate.  I hope you will give it a try!

RECIPE FOR CHOCOLATE PEANUT BUTTER MARSHMALLOW SQUARES

  • 1/2 Cup Butter
  • 1 Cup Peanut Butter
  • 1 3/4 Cups Chocolate Chips
  • 1 Small Bag of Mini Marshmallows

1)  Line a 9×9 glass dish (or pan) with saran wrap.  Using saran wrap makes it easy to remove the final product from the dish and cut into squares.  If no saran wrap is available, grease the dish/pan with butter.

2)  On medium heat, and using a double boiler, melt the butter and peanut butter together.

3)  Add chocolate chips and stir until completely melted.

4)  Remove from heat and slowly fold in the marshmallows.  Try your best not to simply stir as the marshmallows will melt quickly and lose their rounded shape.

5)  Pour mixture into the dish/pan and spread evenly.

6)  Chill in the fridge for at least half an hour to 45 minutes.  Once chilled, cut into squares and enjoy!

There you have it!  You can try a few variations with this recipe too:

  • Replace the chocolate chips with butterscotch chips
  • Drizzle white chocolate over the top for a fancy look
  • At Christmas, use peppermint flavored mini marshmallows for a holiday twist

One final suggestion for you.  If you’re not a fan of chilled squares, try heating one up in the microwave for approximately 12-14 seconds.  I guarantee warm, gooey deliciousness!!  Enjoy!

My Famous Chocolate Chip Cookie Recipe!!

Image

Ok so I’ve decided to share my much sought after chocolate chip cookie recipe with you!

Most chocolate chip cookie recipes use both white and brown sugar and often turn out to be crunchy.  Sure those cookies taste ok, but they’re not my cup of tea.  I wanted a cookie which didn’t use as much sugar and that wouldn’t break off my teeth while I was eating one.  After months and months of trying different recipes, I found one that was perfect for me!  Not only that, but after serving them to family and friends, everyone wanted a copy of the recipe!

This cookie relies only on a single cup of brown sugar, vanilla and the chocolate chips for its sweet taste.  The texture is soft and light.  One suggestion I would make would be to use Hershey’s Milk Chocolate Chips for the recipe.  I find they really add to the flavor of the cookie.  I really hope you enjoy these as much as I do!

The Newfoundland Mommy’s Chocolate Chip Cookie Recipe

  • 2 1/4 Cups Flour
  • 1 tsp Baking Soda
  • 1 tsp Salt
  • 3/4 Cup Softened Butter
  • 1 Cup Packed Brown Sugar
  • 3 Eggs
  • 1 tsp Vanilla
  • 1 Package Milk Chocolate Chips (approximately 2 cups)

1)  Preheat your oven to 375°

2)  In a medium bowl, mix together the flour, baking soda and salt.  Set aside.

3)  In a large bowl, whisk the butter and brown sugar until they are light and fluffy.  Add the eggs one at a time until each is whisked in completely.  Add vanilla.

4)  Slowly whisk in the dry ingredients to your wet ingredients (about 2-3 tbsp at a time).  Once fully combined, add chocolate chips and mix well.

5)  Drop teaspoon size portions onto a parchment lined cookie sheet.  Do not flatten.

6)  Bake for 8-10 minutes until golden brown.  Allow to cool for a minute before transferring the cookies to a cooling rack.

This recipe yields approximately 48 small cookies or about 28-32 larger cookies.  It all depends on how big/small you want them to be of course.  Good luck and enjoy!